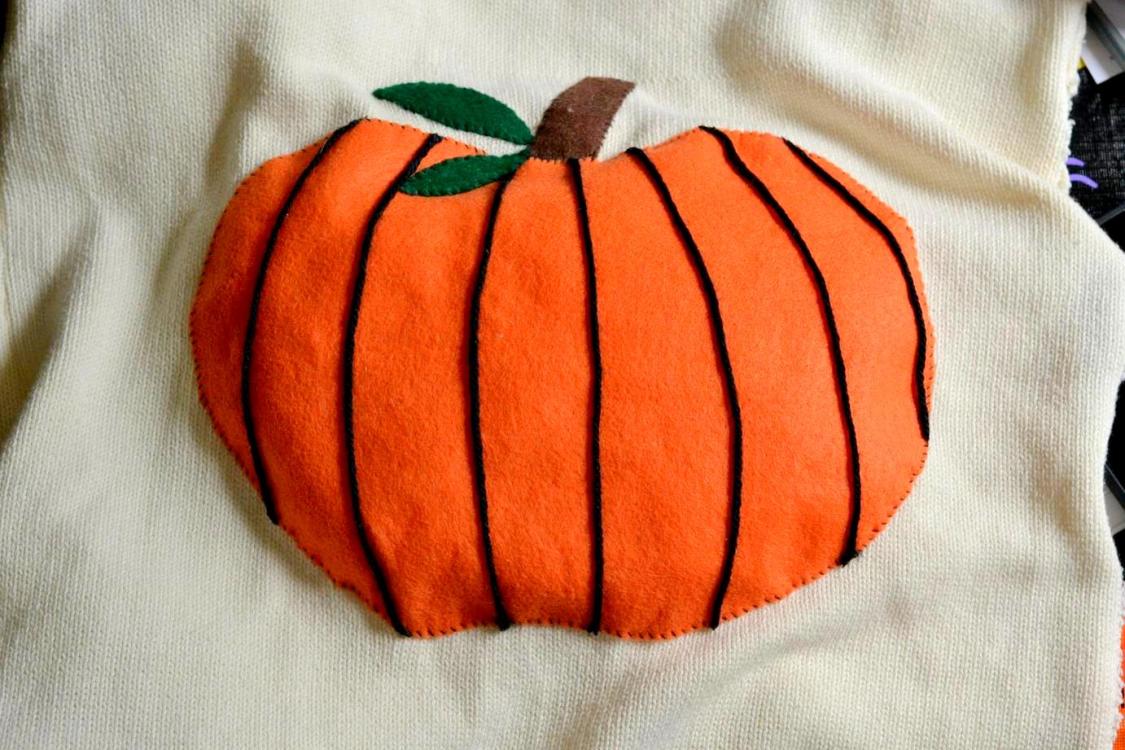
I’m not sure why, but I’ve always been obsessed with over-sized old man sweaters. They’re big, cozy, and just make you want to snuggle up in front of a fire on chilly days. I purchased one from the thrift store about a year ago, but it didn’t fit very well so I decided to turn it into a cute pillow instead! I made a big pumpkin patch (ALL pun intended) out of felt and stitched it on to create a festive throw pillow perfect to lounge on for fall.
…..

Supplies:
1 large sweater (I scored mine from the men’s section at Goodwill for a few bucks)
1 sheet of orange felt
1 sheet of green felt
1 sheet of brown felt
Pumpkin stencil (you can draw one or print one out)
Chalk
Measuring tape
Ink pen
Straight pins
Fabric glue (I swear by Unique Stitch!)
Black or brown yarn
Black thread
White (or corresponding color to your sweater) thread
(1.) First cut the sleeves off your sweater. You can save these to make boot toppers or mug cozies so hang onto them! Turn the sweater inside out and measure out a large (or small depending on your preference) square on the sweater. Use an ink pen to make small dashes next to the tape measure so you know where to pin and cut. (2.) Cut out and sew around three edges leaving one side completely open. Turn right side out and set aside.

(3.) Print or sketch out your pumpkin stencil and line it up on your orange felt. (4.) Cut out the stencil and trace around it on the felt with chalk. Repeat with leaves on the green felt and a pumpkin stem on the brown felt. (5.) Place the pieces in the center of your pillow where you would like to tack them down. (6.) Run a thin line of fabric glue under the bottom edges of the pumpkin, leaves, and stem. If you’re worried about the glue seeping through the sweater to the other side you can place a piece of wax paper underneath in between the two sides.

(7.) Cut out 7-8 pieces of yarn just slightly longer than the height of your pumpkin. Arrange them across the patch to mimic the lines in a real pumpkin. (8.) Run a thin line of fabric glue where you want to place the yarn and lightly press the yarn into the glue. (9.) Repeat with remaining pieces. (10.) Snip off excess yarn from the ends and allow glue to set up for 30-45 minutes.

(11.) Once glue has completely set up, stitch around the pumpkin patch, stem, and leaves, leaving a 2 inch opening at the edge of the pumpkin. (12.) Lightly stuff the pumpkin (use a pencil to push the stuffing to the far edges) so it has a more “3D” effect and then finish stitching closed.


Now that we’re all finished up with the patch we can close that last end up a bit more.
(13.) Turn the pillow inside out again and sew along the last edge, leaving 3-4 inches left undone. Turn the pillow right side out again and fill with pillow stuffing. (14.) Use a slip stitch to close the remaining seam opening. If you’re not familiar with a slip stitch, there’s a really helpful how-to tutorial from The Crafty Sisters you can follow!

Now you.. or your cat.. can enjoy your handy work!


Loard Eva says
Wow…..the pumpkin pillow is really awesome! Thanks for sharing.